This is a continuation from my previous post which demonstrated how to create a simple ASP.NET MVC 4 application with Entity Framework using Adventure Works 2008 Database and Visual Studio 2012. In this post, I will show you how to navigate our list of products using up and down arrow. I love how on Google search results page you can navigate search results by using up and down arrow. If you haven’t tried it then give it a try on Google.com. (There are plenty of examples on this on StackOverflow. However, I have tweaked to make it work for my example.)
We are going to modify our products page so that we can select an individual product using keyboard up/down arrow. After you select a product and hit enter (or return key) it should open up a details page for this particular product. To make this happen we have to do few things.
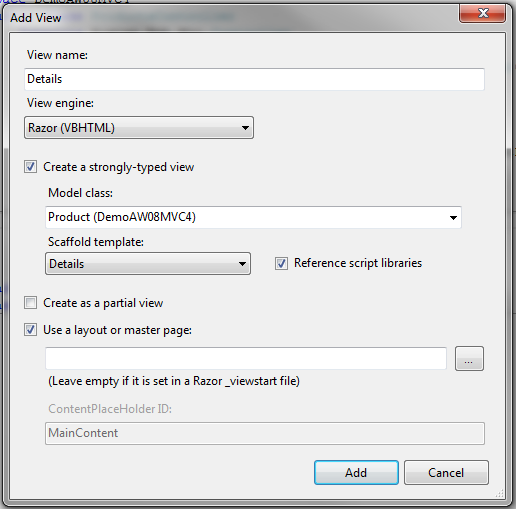
Right click the Details or anywhere in the function above and add another view with following details.
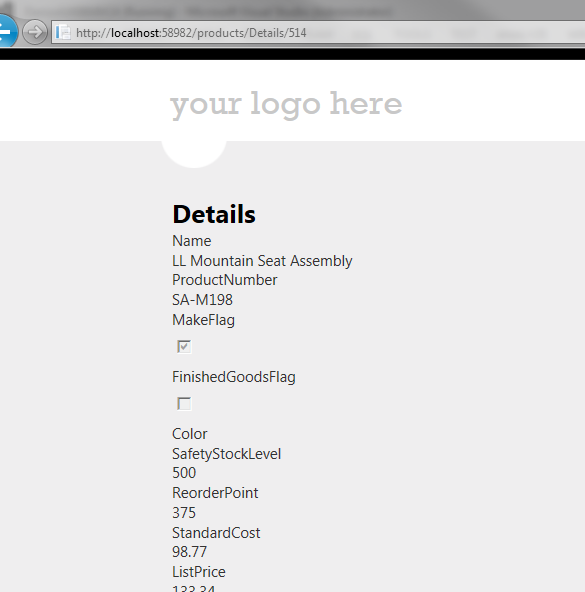
Run the project and navigate to the following URL.

Click on the first link and you will see details of it.
Now we have to add this simple javascript to this page.
<script type="text/javascript">
From now onward if you want to add scripts to your individual view you should add them in a section as highlighted in yellow in the above code. This will render this tag at the bottom of you rendered page which is a recommended practice and improves performance. And this will load after the jquery scripts have loaded. If you don’t put your javascript script tag inside @section block then a Jscript runtime error will come up if you are debugging using Internet Explorer. If you are debugging using Chrome or Firefox it won't show you a dialog box with this error.
Microsoft JScript runtime error: '$' is undefined
The above javascript code finds an element with “plist” which is our table and finds all the rows with “prow” class and puts in a $rows variable. Same thing we do will all the links with class “detlink” and put them in $links variable. And from there we just detect up and down arrow by checking the e.keyCode number and highlight and unhighlight that particular row. Once we find a particular row then we will focus that link by using .focus() function of jquery. $links.eq(current_index).focus();
Before finishing do this
1. Add id=”plist” to our table tag.
2. Add class="prow" to tag after for each loop
3. Add following classes to your site.css
Add a link to our navigation bar into our _layout.vbhtml page.
Run the project and click on the products page and navigate using up down arrow and then enter to show the details page for the selected product.

We are going to modify our products page so that we can select an individual product using keyboard up/down arrow. After you select a product and hit enter (or return key) it should open up a details page for this particular product. To make this happen we have to do few things.
- We want to make products name as hyperlinks to details page so when you click on it, it should show us details page of that particular product.
- Add a details view to show product details
- Wire up the above two with a function in productscontroller.vb page
- Use jQuery to make this thing happen.
- Add Css to indicate which row is highlighted.
Right click the Details or anywhere in the function above and add another view with following details.
Run the project and navigate to the following URL.
Click on the first link and you will see details of it.
Now we have to add this simple javascript to this page.
@section scripts
$(document).ready(function () {
var $window
= $(window);
var
current_index = -1;
var $links
= $("#plist").find(".detlink");
var $rows =
$("#plist").find(".prow");
items_total =
$links.length;
//alert($links.length.toString());
$window.bind('keyup', function (e) {
if
(e.keyCode == 40) {
dehighlight_row();
if
(current_index + 1 < items_total) {
current_index++;
highlight_row();
}
} else if
(e.keyCode == 38) {
dehighlight_row();
if
(current_index > 0) {
current_index--;
highlight_row();
}
}
});
function highlight_row()
{
$rows.removeClass('prow');
$rows.eq(current_index).addClass('prow-sel');
//$input.val(current_index);
$links.eq(current_index).focus();
}
function dehighlight_row() {
$rows.removeClass('prow-sel');
$rows.eq(current_index).addClass('prow');
//$input.val(current_index);
$links.eq(current_index).focus();
}
});
</script>
End Section
From now onward if you want to add scripts to your individual view you should add them in a section as highlighted in yellow in the above code. This will render this tag at the bottom of you rendered page which is a recommended practice and improves performance. And this will load after the jquery scripts have loaded. If you don’t put your javascript script tag inside @section block then a Jscript runtime error will come up if you are debugging using Internet Explorer. If you are debugging using Chrome or Firefox it won't show you a dialog box with this error.
Microsoft JScript runtime error: '$' is undefined
The above javascript code finds an element with “plist” which is our table and finds all the rows with “prow” class and puts in a $rows variable. Same thing we do will all the links with class “detlink” and put them in $links variable. And from there we just detect up and down arrow by checking the e.keyCode number and highlight and unhighlight that particular row. Once we find a particular row then we will focus that link by using .focus() function of jquery. $links.eq(current_index).focus();
Before finishing do this
1. Add id=”plist” to our table tag.
2. Add class="prow" to tag after for each loop
3. Add following classes to your site.css
.prow{}
.prow-sel {
border:1px solid green;
}Add a link to our navigation bar into our _layout.vbhtml page.
<nav>
<ul id="menu">
<li>@Html.ActionLink("Home", "Index", "Home")</li>
<li>@Html.ActionLink("About", "About", "Home")</li>
<li>@Html.ActionLink("Contact", "Contact", "Home")</li>
<li>@Html.ActionLink("Products", "Index", "Products")</li>
</ul>
</nav>
Run the project and click on the products page and navigate using up down arrow and then enter to show the details page for the selected product.
Give your feedback or if you find any bugs or have a better way of doing it, I would be more than happy to know about it. Thanks.
No comments:
Post a Comment