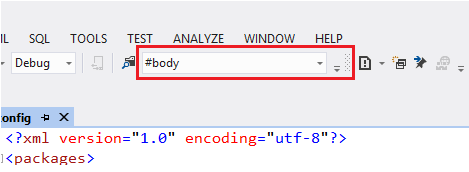
In this blog post, I am going to show you how you can easily accomplish certain tasks within Visual Studio using Visual Studio commands from the Find Box that is provided at the top[see image below]. The Find Box is not enabled by default to appear in the toolbar, as a result few developers know about it. The trick is that Find Box can be converted into a command box when you place a greater than < symbol in it and execute Visual Studio commands. When I found about this I was totally psyched. To get started lets see if you have the Find Box in the toolbar above like me. See the image below.
If not then here is how you can enable it. By default this will not be enabled in a fresh install of visual studio. First click on the Add or Remove Buttons option to enable it. Then below the Find in Files option there is just a Find option as highlighted in red box. Click in front of it to enable it.
 Once you have enabled it you can use Ctrl+D to quickly search something. Pretty cool right but we are not there just yet. In the Find Box put a > character then start typing like File.Open or Edit.Replace something like that. Did you just see what happened!!!

Find Box has now become a command box. It shows all Visual Studio commands which you can use to do certain tasks without leaving your keyboard. You might be tempted to ask me, "So Mitul is there a shortcut to insert > sign into the Find [or sorry command] Box so I can directly start typing Visual Studio commands?". Yes there is. Ctrl + / and it will insert > sign in the Find Box to convert it into a command box.
"So how is this useful?" and "How is this going to save me time?"
In this case you have to constantly think which tasks you do most frequently with mouse in visual studio and you can perhaps find a command for that action. Then you can take advantage of this feature to save time. There are predefined aliases for some of these commands.
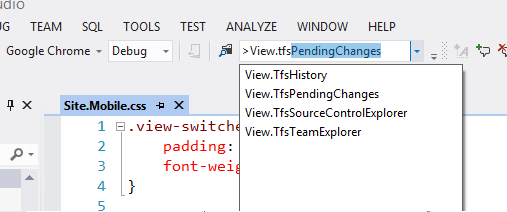
So one of my favorite uses of command box is to open up Pending Changes window and TFS SourceControl Explorer window. Go ahead and try to find TFS SourceControl Explorer window from the Menu and see how much time it takes. Or even from the Team Explorer because I don’t have it always opened in visual studio.
But Ctrl + / and type View.TfsSourceExplorer and hit enter. Its opens up TFS SourceControl Explorer window for you. Again for the PendingChanges window use TFSDynamicSlientCheckin. Opens up Pending Changes and there you are. It is very quick and easy. It depends on person to person how they might find this feature useful.
Pretty cool feature and yet unexplored by many Visual Studio developers out there. Check it out yourself and enjoy the productivity. And please don't forget to share how you use this command feature in Visual Studio in the comments below.
"So how is this useful?" and "How is this going to save me time?"
In this case you have to constantly think which tasks you do most frequently with mouse in visual studio and you can perhaps find a command for that action. Then you can take advantage of this feature to save time. There are predefined aliases for some of these commands.
So one of my favorite uses of command box is to open up Pending Changes window and TFS SourceControl Explorer window. Go ahead and try to find TFS SourceControl Explorer window from the Menu and see how much time it takes. Or even from the Team Explorer because I don’t have it always opened in visual studio.
But Ctrl + / and type View.TfsSourceExplorer and hit enter. Its opens up TFS SourceControl Explorer window for you. Again for the PendingChanges window use TFSDynamicSlientCheckin. Opens up Pending Changes and there you are. It is very quick and easy. It depends on person to person how they might find this feature useful.
Pretty cool feature and yet unexplored by many Visual Studio developers out there. Check it out yourself and enjoy the productivity. And please don't forget to share how you use this command feature in Visual Studio in the comments below.
I tried this and its awesome too.have a list of commands at my disposal! thanks for sharing!
ReplyDelete@Josh - I am glad you liked it.
Delete